Setting Up New Users

This month, we’re going to focus on how you can invite others to join your team and participate with you to create Missions. Read all about it here in our guide for setting up new users!
Many of you have reached out to our staff to assist you with setting up logins for your team, but you might not have noticed that you can do this straight from your end! All Mission Managers have the ability to manage users in their account, by going to the Users Section of the Mission Maker

You can add users in three different ways:
1) Invite User
Send them an invitation to create their own username and login.
2) Create User
Create their account from scratch.
3) Bulk Import Users
Import a bunch of users from an excel spreadsheet or CSV file.
1) Invite User
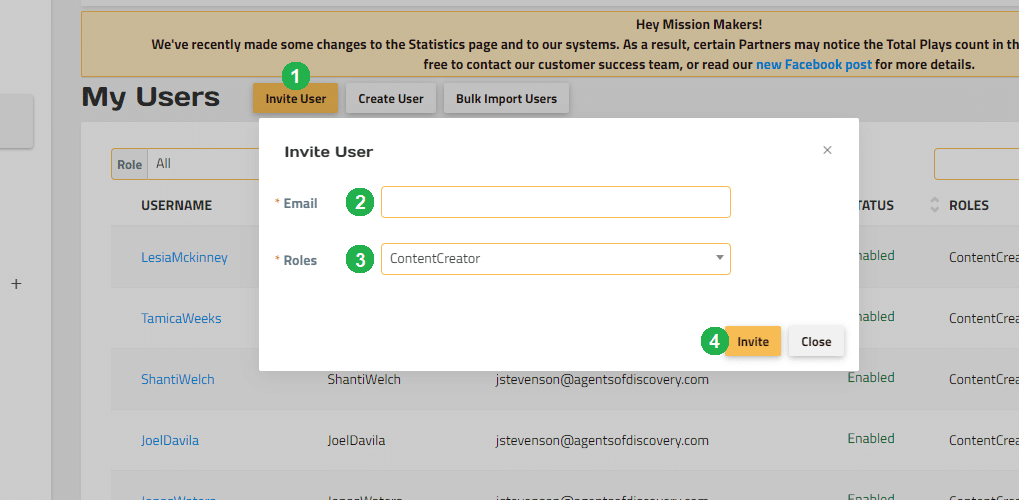
- To simply send an invitation to a new team member or guest, click on Invite User.
- Enter the Email Address you would like to send the invitation to; this address will also receive any notifications or password reset requests tied to this login.
- Set their role as either a Mission Manager, or Content Creator.
- Click Invite. From there, the staff member or guest needs to open that email and follow the instructions to set up their own login!
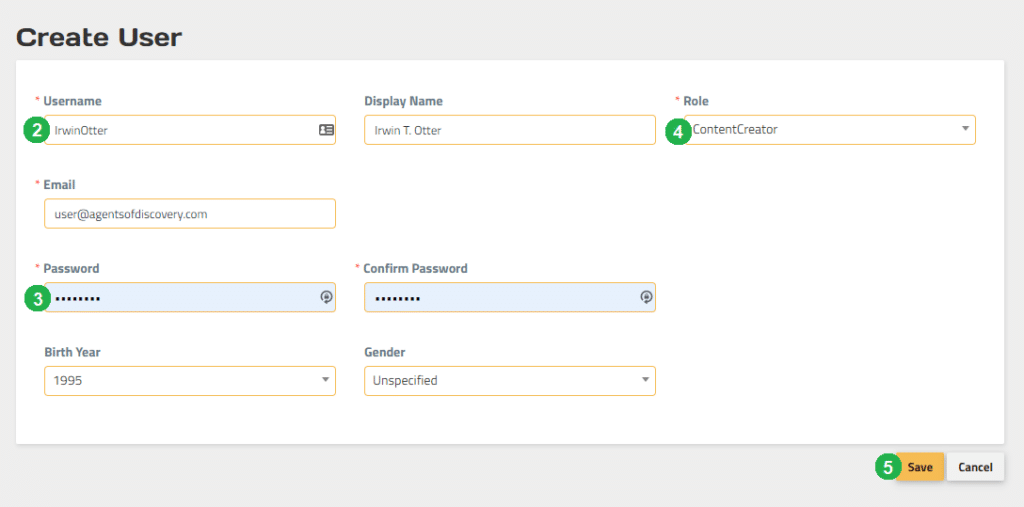
1) Create User
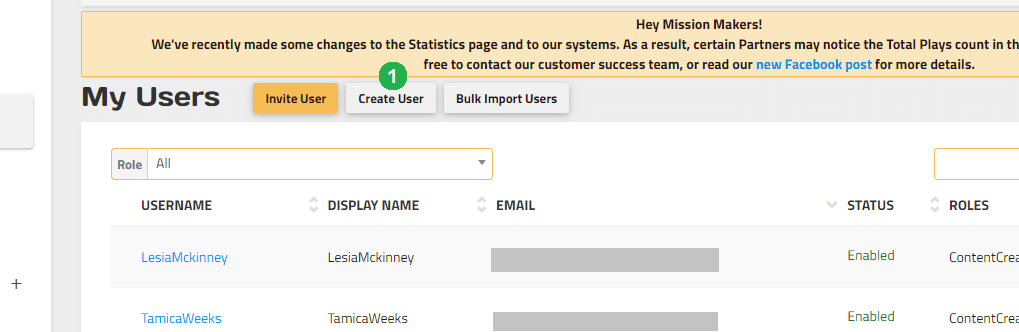
1. To create a user fully from scratch, click on Create User.
1) Bulk Import Users
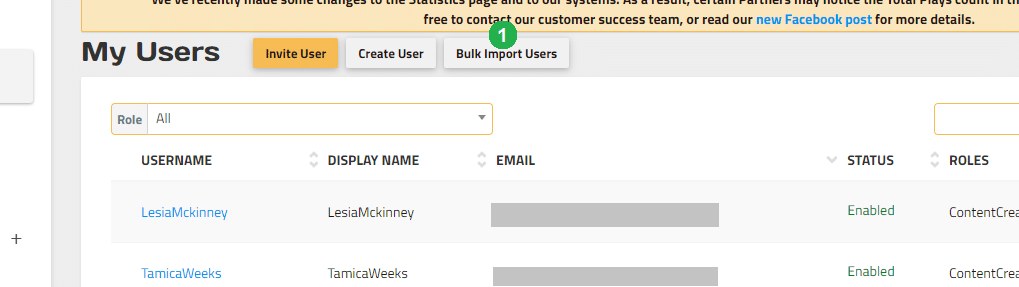
1. To create multiple accounts at the same time for other team members, click on Bulk Import Users. Keep in mind that any accounts created in the Mission Maker will also work in the app, so this is how we recommend setting up groups of players on the accounts they will use when playing your Missions.
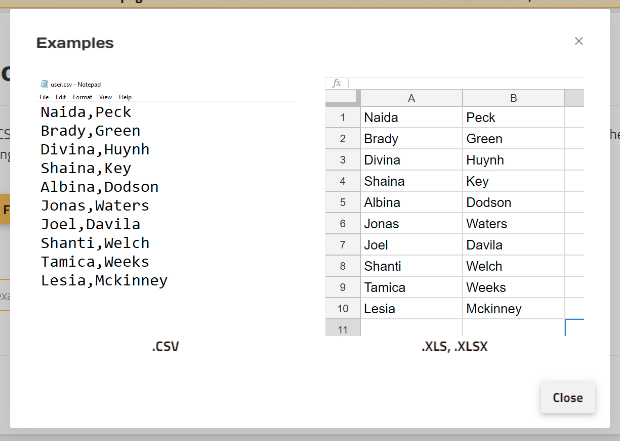
2. You’ll need to prepare a CSV file or a spreadsheet from Microsoft Excel / Google Sheets with the first and last names of the members or students being added. Refer to the examples below to see the recommended format on each file:
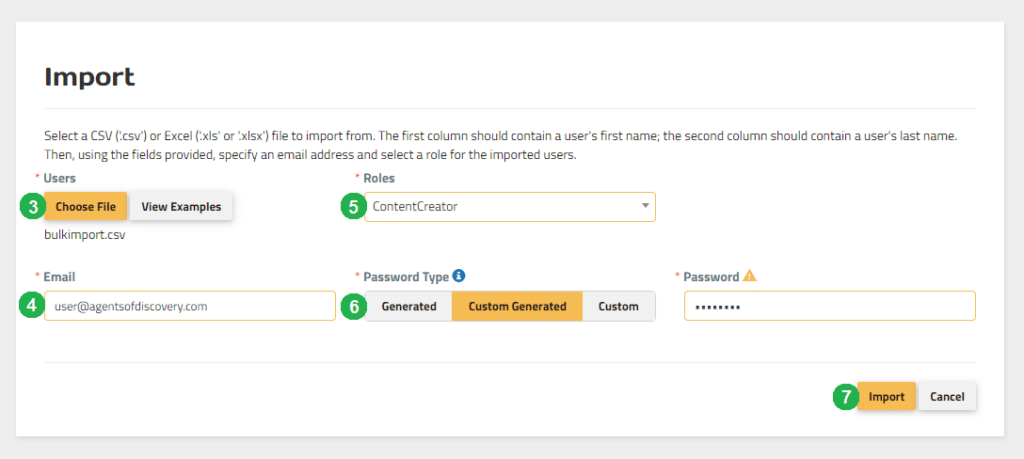
3. Click on Choose File, then upload your spreadsheet or CSV file.
4. Enter an Email Address that these accounts will be tied to (for notifications and password reset emails).
5. Set their role as either a Mission Manager, or Content Creator.
6. Set their password to one of the following:
a. Generated – passwords will be generated for the accounts at random.
b. Custom Generated – this allows you to manually input the first half of the password, at which point the system will add a random bunch of characters as an extension so each password is still unique.
c. Custom – this will allow you to manually input the entire password. The exact same password will be assigned to all accounts.
7. Once you’re done, click Import. The Mission Maker will appear to do nothing at first, but is actually taking a few minutes to generate users from the attached document.
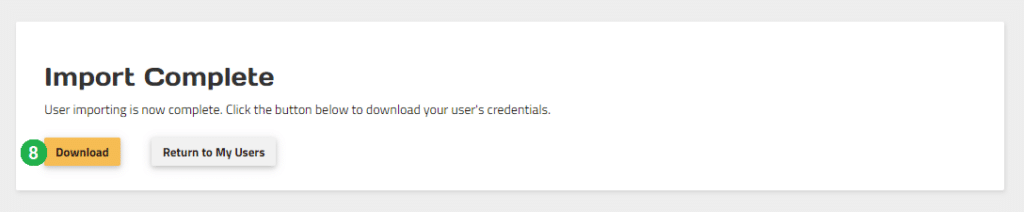
8. Once the import is complete, the Mission Maker will automatically redirect to a page which shows this notification. From here, you can click on Download to see a list of all users that have been created, with their usernames and passwords provided.
9. Print each username and password onto a separate piece of paper and give one out to each user or player that is participating!
This is a great way to set up premade user accounts for a group of visitors or students.
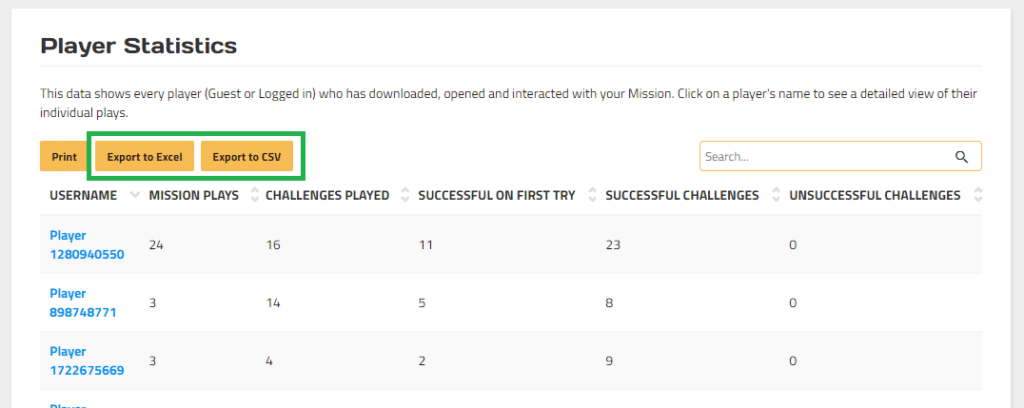
Remember that you can also pass along the user statistics to teachers if they ask. You can do this by navigating to the Player Statistics section on your Statistics page and looking for the associated usernames with that class or school, and you can also export those results to an Excel or CSV file.
Questions?
As always, if you have any questions about Mission Making, please feel free to reach out to our customer success team at:
[email protected]
Don’t forget that you can contact us through Live Chat, which is available by clicking the blue “Help” button in the bottom right corner of the page on our website and Mission Maker. Our team is available and happy to help from Monday through Friday, 9:00 – 5:30!
If you haven’t done so already, please be sure to join the Mission Makers Facebook Group where you can connect with other Mission Makers around the world to share content, ideas, and methods for sharing your Missions!
Happy Mission Making!
Regards,
The Agents of Discovery Customer Success Team