Custom Maps 🗺

Top o’ the mornin’ to ya, Agents! March is here and we’ve got a brand new pot of gold to share with you.
To keep the topic rolling, we’re going to follow up our last blog entry with even more great information on how to improve the navigation and wayfinding in your Missions. Specifically, we’re going to take a look at:
Enhanced + Custom Maps
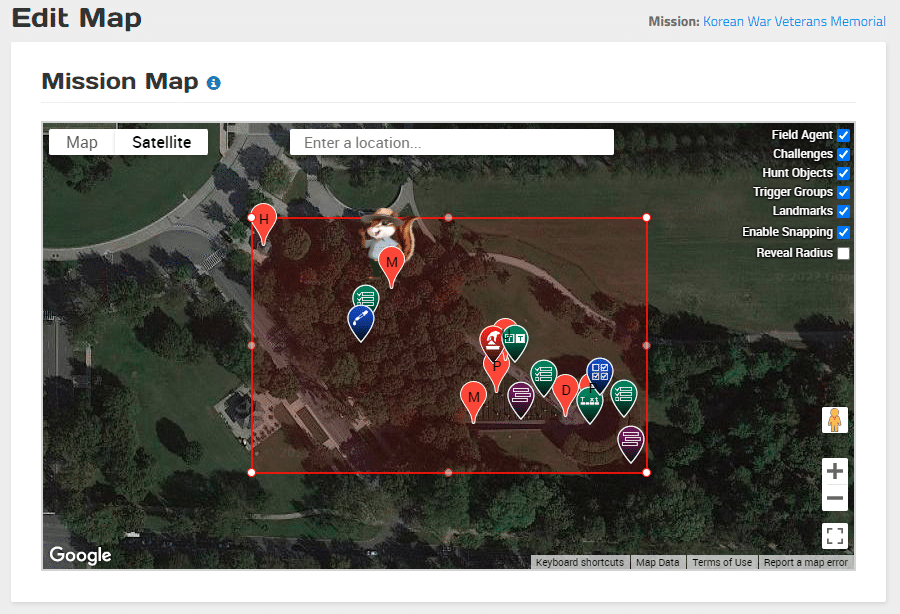
As you know, the Mission Maker uses the Google Satellite Map in order to display your Mission boundaries on the app when a guest plays your Mission. Our buddies at Google do a pretty good job at providing accurate map info, but the system isn’t perfect and sometimes this can create problems, including:
- Walking paths obscured by a forest / tree canopy
- No ability to display the inside layout of a building
- Outdated map sections that show what the area looked like ten years ago but has nothing to do with the current layout
- A stray cloud that the editors at Google forgot to get rid of that just so happens to be RIGHT over your public space (we’re not kidding, this one has actually happened before)
These would all be massive deal breakers on a client’s Mission, if not for the ability to upload custom images over top of the Google Map. This is available to you while editing your Map boundaries, and you can upload any image over top of the Google Map. If you have a detailed map of your walking paths, you can place that right into your Mission!
Creating the Map
If you are interested in using a different map but don’t have a dedicated graphics team, don’t worry! If your package is at the Silver level or higher, you will be able to claim a map free of charge, which is included in your package at no additional cost just like your Field Agent and poster(s).
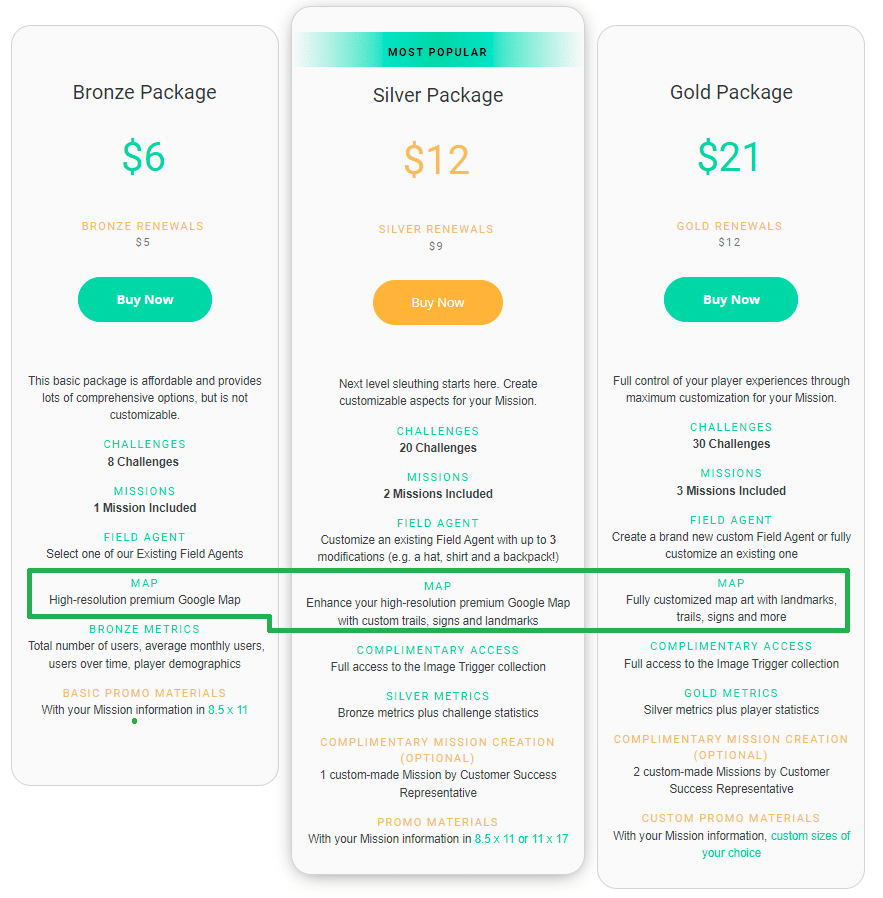
But what exactly are Enhanced and Custom Maps? Great question!
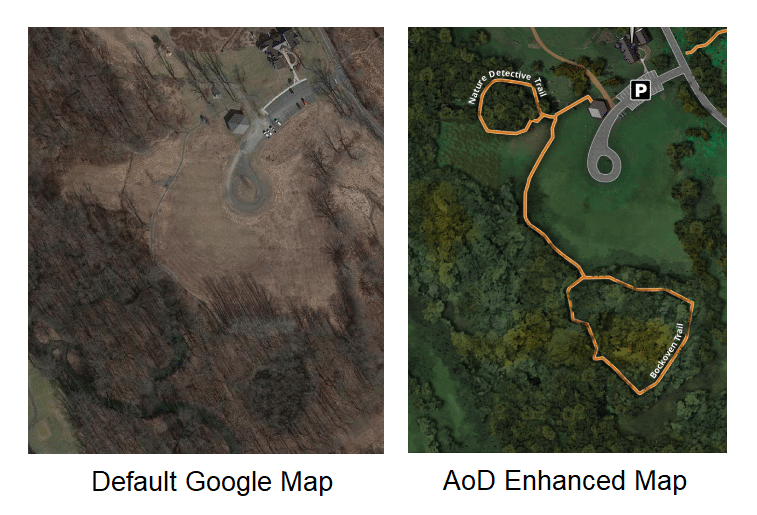
Enhanced Maps are included free with every Silver package, and will still be a basic top-down Satellite image of your public space, but with highlighted trails and landmark labels to help the guest navigate the intended path and locate any important points of interest that may show up as the subject matter in their Challenges.
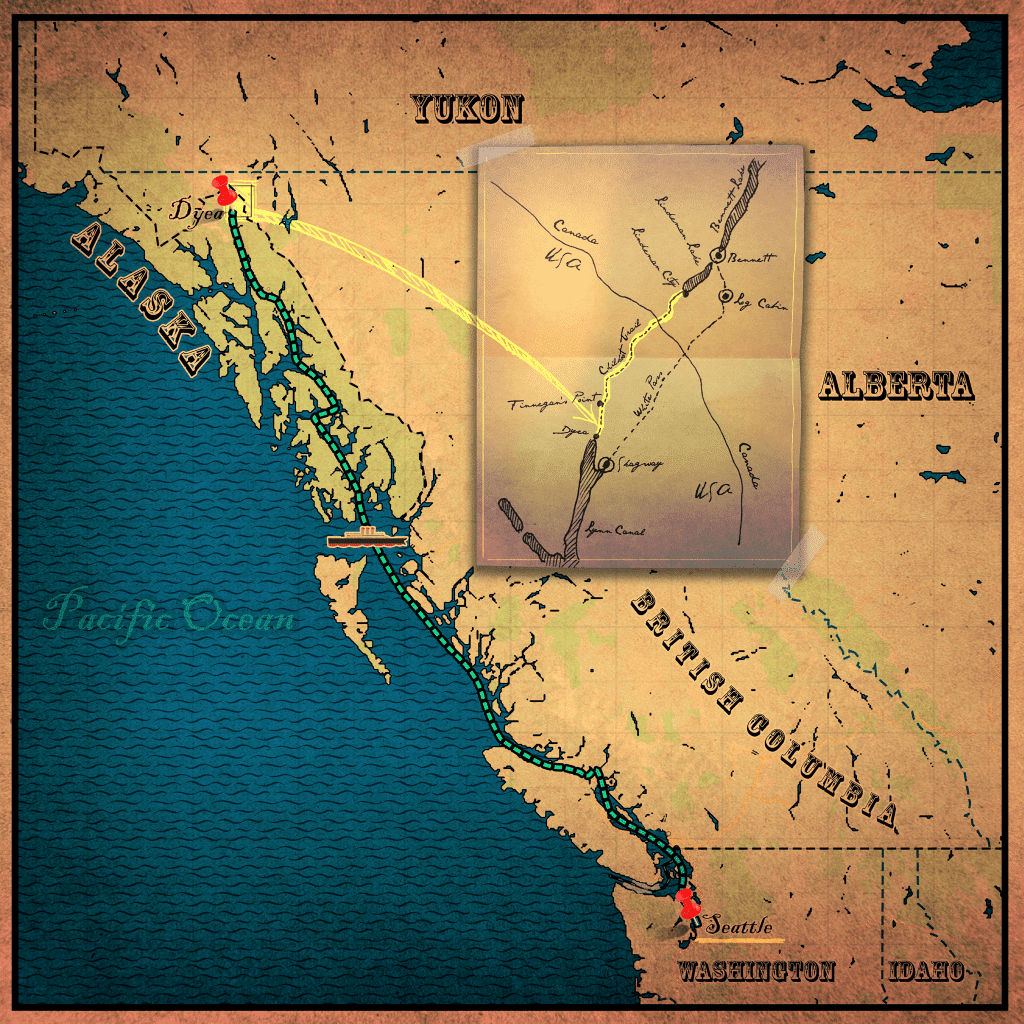
Custom Maps take things one step further – not only will we highlight your trails and landmarks, but our art team will design the map from scratch, using any requested stylistic features or graphics to help you get exactly what you’re looking for. This means that in addition to creating high quality maps of outdoor spaces, our team can also create interior maps for any Missions that take place in buildings!
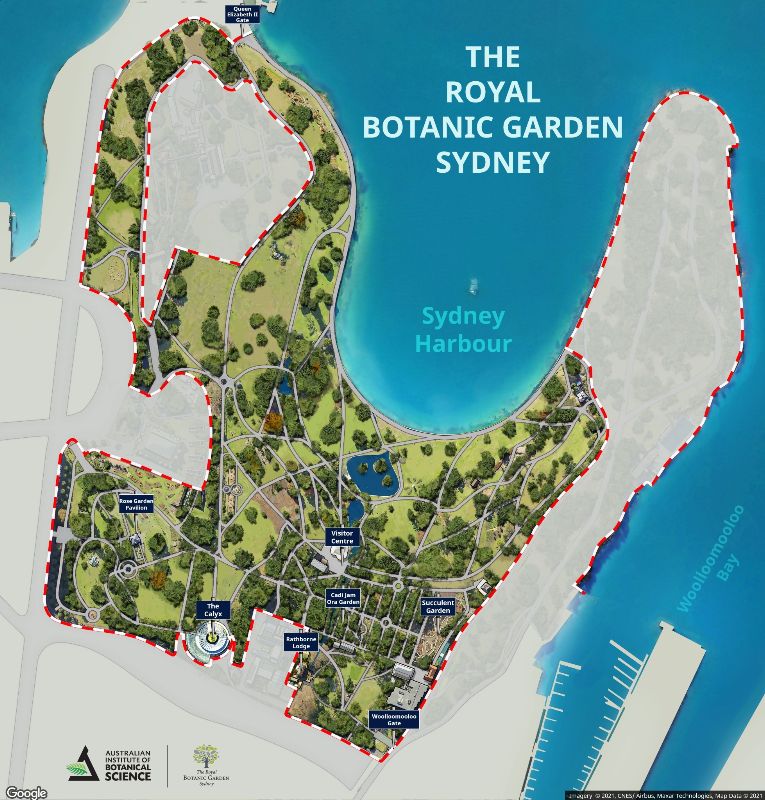
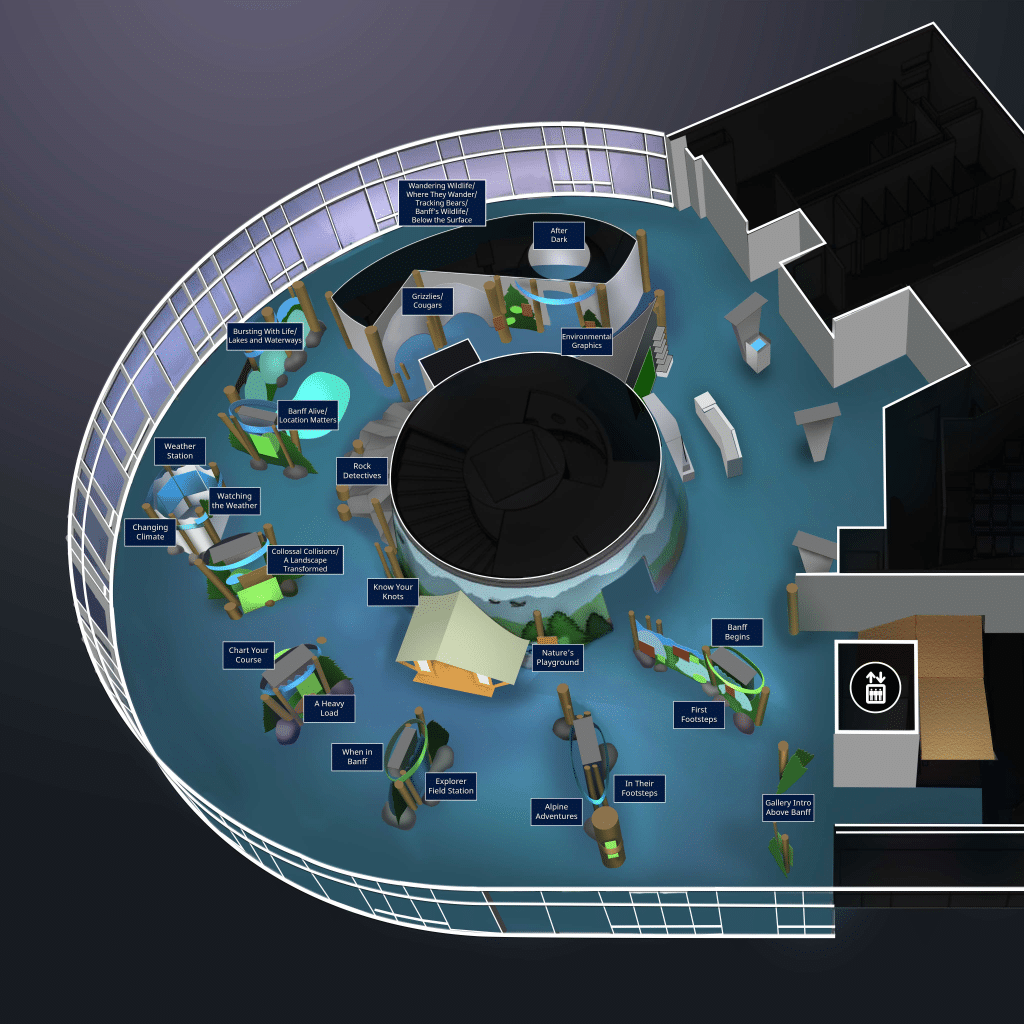
These are all examples of Custom Maps; the first map is for a GPS Mission, while the second and third maps were created for Trigger Missions that don’t require the layout to be exactly accurate like it would need to be in a GPS Mission.
Uploading the Map
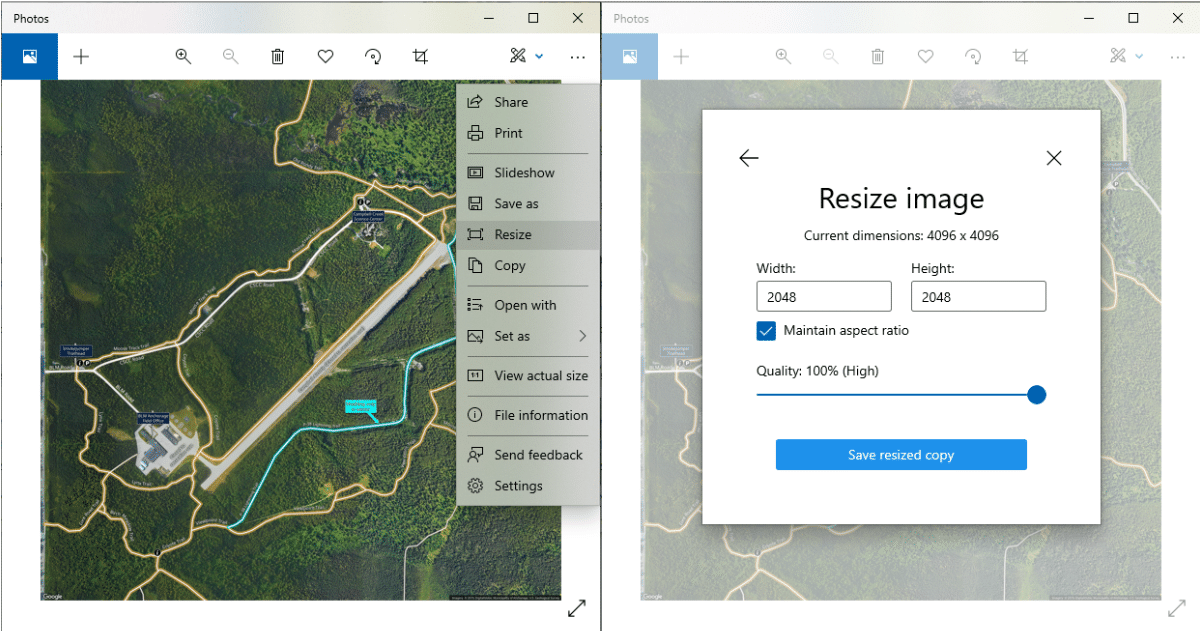
1) First, you’ll need to make sure your image is either a JPG or PNG file and that it does not exceed 2048 x 2048 pixels. If it does, you will need to re-size it.
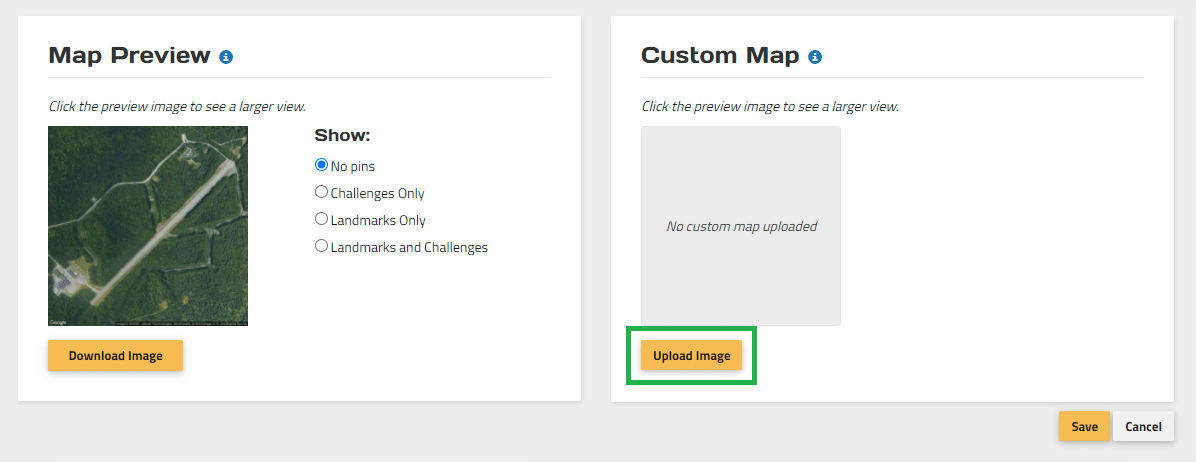
2) On the Edit Map page, just navigate down to the bottom of the page where it says Custom Map, and click on Upload Image.
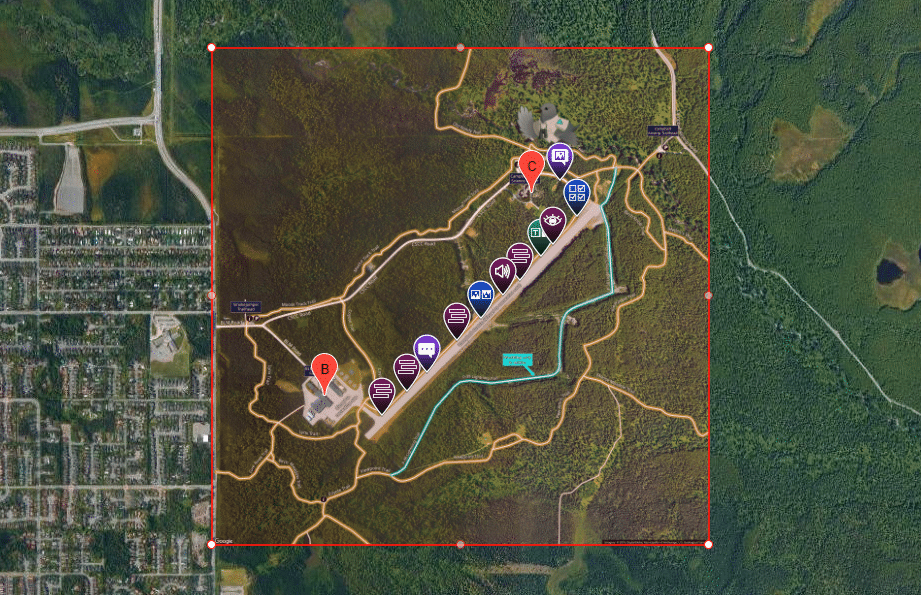
3) When the image is uploaded, it will go right over top of the map boundaries you had in place, but the dimensions will be updated to the dimensions of the new image. From here, you will need to re-size the image and reposition it until the contents of the image line up with the outside surroundings on the Google Map. This is important for GPS Missions so that the player’s marker still follows the path correctly when they are moving through the space.
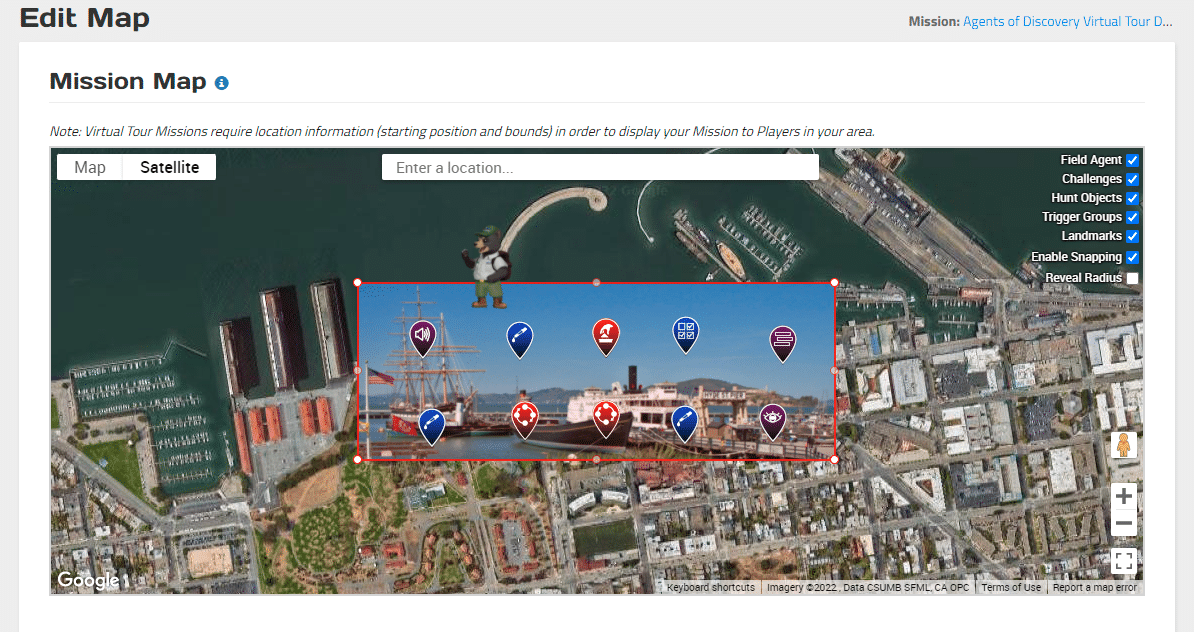
For Trigger / Virtual Tour Missions that don’t require a GPS map, consider adding a regular image over top of the map instead. This will make the Mission look much more cohesive, without confusing players into thinking they need to be on location. Above is the layout for the Agents of Discovery Virtual Tour Demo Mission, which is available to play from anywhere without the need for GPS or Trigger Images.
Once your map is uploaded…
Please go out and test your Mission! It is super important to make sure the map displays correctly and still reflects your player orientation, and unfortunately this is not something the AoD staff can help you with as we are not on location.
If you are having trouble getting a map to line up correctly, or would rather leave this in the hands of someone who does it all the time, reach out to your CS team and we’ll help you line it up (but again, please go out and test it once we’ve done so)!
Questions?
As always, if you have any questions about Mission Making, please feel free to use our Website’s Live Chat, or reach out to our customer success team at:
Alternatively, give us a call at 1-855-564-7328 (ext. 212)!
If you haven’t done so already, please be sure to join the Mission Makers Facebook Group where you can connect with other Mission Makers around the world to share content, ideas, and methods for sharing your Missions!
Happy Mission Making!
Regards,
The Agents of Discovery Customer Success Team
